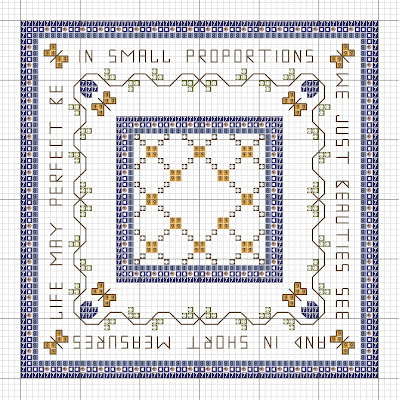
Here is a basic tutorial for finishing a biscornu. Making these eight-sided little pincushions is easier than it looks. When you are done you will have an exquisite little treasure - a thing of beauty and a joy to hold. The model I have used in these photographs is called 'Stella by Starlight,' - the free pattern is now available here on my blog!
Stella by Starlight Free Pattern.

1. Embroider two squares of equal size with the design of your choice. Then backstitch a square around each - in this example the squares are both 42 stitches by 42 stitches. This will become your whip-stitching edge - so anchor your threads firmly.
2. Cut backing fabric - at least 4 cm or 2 inches larger than the design area.
3. Pin the backing fabric to the embroidery.

4. Sew the backing fabric to your embroidery - place stitches within 1 cm of the whipstitching edge.
5. Trim each side - cut 1 cm outside the whip-stitching edge. Your backing fabric will still be attached.
6. You are now ready to join the two squares. Thread a blunt-ended needle with two strands of floss.

7. Come up at the corner of one square.
8. Pass your needle through the first stitch to the left.
9. Continue to pass your needle through either
the first stitch to the left of center, if your sides have
an even number of stitches, or
the center stitch if your sides have
an uneven number of stitches.

10. Bring the two sides together. Fold the excess fabric under and press the two backstitched lines together.
11. Continue to whipstitch to the left, matching one stitch to one stitch.
12. Your whip-stitched edge will start to look like this.

13. When you approach your first corner, prepare to turn.
14. Fold the excess fabric from the new side under.
15. Bring the bottom edge around to meet the new side.

16 and 17. Continue whipstitching.
18. When you come to your second corner, prepare to turn again.

19. Bring the two edges together as before.
20. Continue whip-stitching around the biscornu, turning each corner and matching stitch to stitch until six sides have been formed.
21. When two of the eight sides are left, stop to fill your biscornu.

22. Add batting to the inside of your biscornu.
23. Lavender can be added if desired. (This is my favorite thing to do with biscornu, because they smell wonderful when I pick them up.)
24. Finish with more batting. The biscornu should be firm, but not so tight that you can't create the characteristic dimple when you add your buttons later.

25. Continue whipstitching.
26. Turn your seventh corner, folding the edges into the biscornu.
27. When you come to the last stitch, discreetly knot the threads to finish.

28. Using a sharp needle and strong thread, add buttons or beads to the center of the biscornu. Pull firmly enough to create a dimple where your buttons or beads are placed. Knot it off securely.
29 and 30. You are finished! Isn't your work pretty? If you'd like to see more patterns for biscornu - visit me on Etsy - at www.RainburstEmbroidery.etsy.com.
Happy Stitching!
Caroline


